Simple, Configurable Switching.

Greetings All. A quick-ish post today, but an important one for those of us set in our ways when it comes to different technologies.

I recently found myself in need of a new, small network-switch for my home office. Like many other professionals, I work from home. Unlike many other professionals, I have worked from home (when not traveling) for the last 12+ years. My home office resembles something of a lab meets a meeting space meets a man cave, with an office in the middle of that madness somewhere. I wired the home with Cat6 upon purchasing it but I need far more than just one wall drop (I converted Cat6 phone jacks to RJ45s, I love when contractors over-build!). To that end, I have a switch in my office that uplinks to the core/server switches in my network room. I need power over ethernet (PoE) as I have multiple IP phones and video units in various states of configuration as well as a Unifi AP installed that uses in-line power. I also need layer 2 capabilities and either LLDP-MED or CDP for my phones. On the flip-side I need a quiet switch as I am on the phone (or headset) multiple hours of the day dealing with customers that hold me to higher standards than they hold themselves.

In the past I’ve used, almost exclusively, Cisco switches as I work with the brand often in my professional endeavors and find them to be easy to deploy and understand (for the most part). The switch that I am replacing in this narrative is, in fact, a Cisco 3560CX-8PS. This flavor of 3560 is fan-less (quiet) and provides 8 Gigabit Ethernet ports with PoE+ (15.4 watts). It also has two copper/SFP Gigabit uplink ports as well. Additionally it supports basic inter-VLAN routing, which is not terribly important given the satellite nature of where it is deployed (VTP from the core). While this switch is great, it is bigger (physically) than it needs to be and it cost me around $800 on the gray market. Additionally, I found that I needed it for another project and thus I began searching for an office replacement. I first started my search by looking for another 3560CX, I can find refurbished models for $500-1000. I like Cisco gear, but not for that price. I looked at some HPE/Aruba options but those too are more expensive than I’d like and have roughly the same size constraints as mentioned above.

At this point I started to question what I really needed. I need the ability to tag and trunk VLANS and perform the other basic tenants of a solid Layer 2 switch. I need either Cisco Discovery Protocol (CDP) or Link Layer Discovery Protocol – Media (LLDP-MED) for my phones and video units. I need PoE, as stated before, but I honestly don’t need 8 ports, I could do with 4 in most situations. I want something small and I need something quiet. To that I end I looked where I should have started looking in the first place…Ubiquiti.

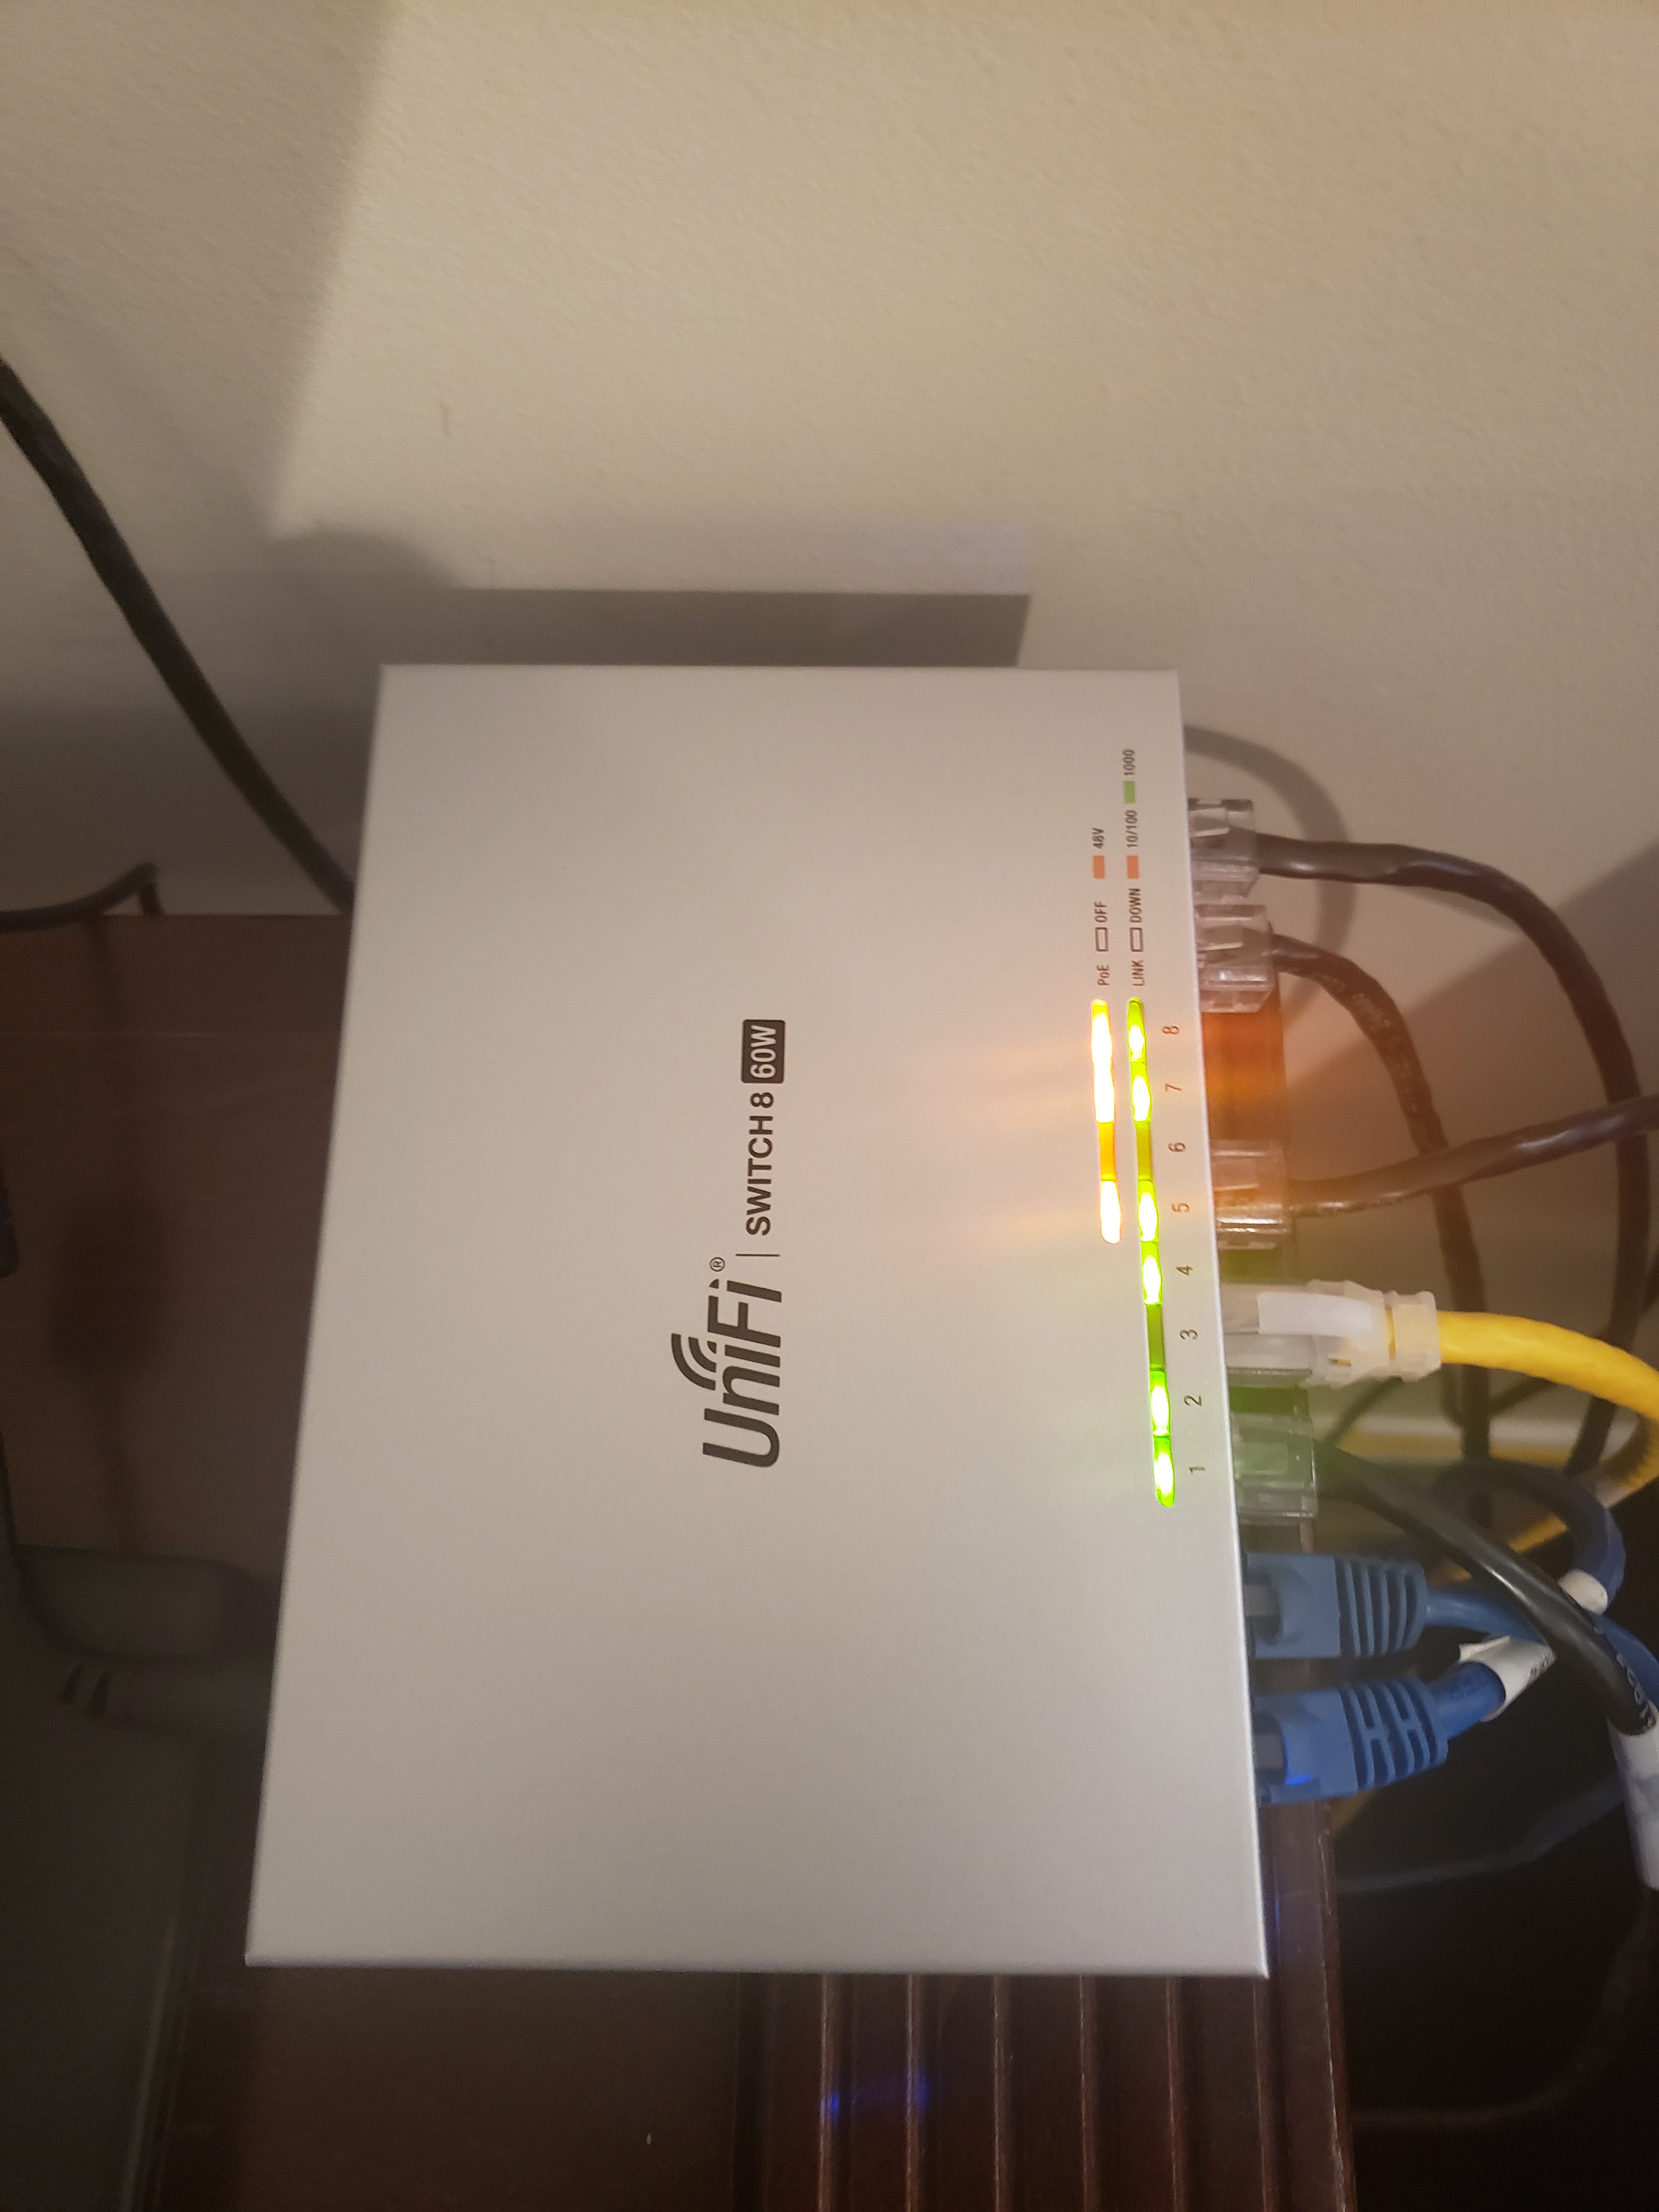
If you’ve read any of my other blog posts, you know that I have Ubiquiti wireless APs and that I also have a Ubiquiti USG security gateway, I’ll put a link here if you are curious about that adventure. With the APs and USG I have a Unifi Network Controller that is constantly running and provides very useful insights on the wireless and security portions of my network. With all of that said, their switching offerings were my next logical step and I went on Amazon and found a US-8-60W switch for $125 with tax (and free shipping). If you know Ubiquiti models, you will figure out that this is a previous generation of the controller-based 8-port PoE (on 4 ports) Gigabit Layer 2 switch. It is fan-less (quiet!) and has an external power supply that can be easily hidden. The 4 PoE+ ports supply up to 15.4 watts of power per interface and it has native support for LLDP-MED.

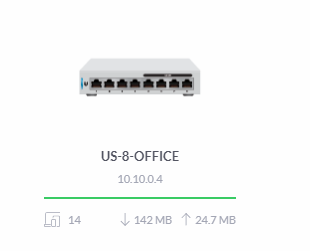
The installation was simple. I plugged it in and connected the uplink. It was adopted by the controller (with the help of Layer 2 discovery and DNS records) and the code was upgraded. From there I created port profiles and assigned them to the 8 ports.

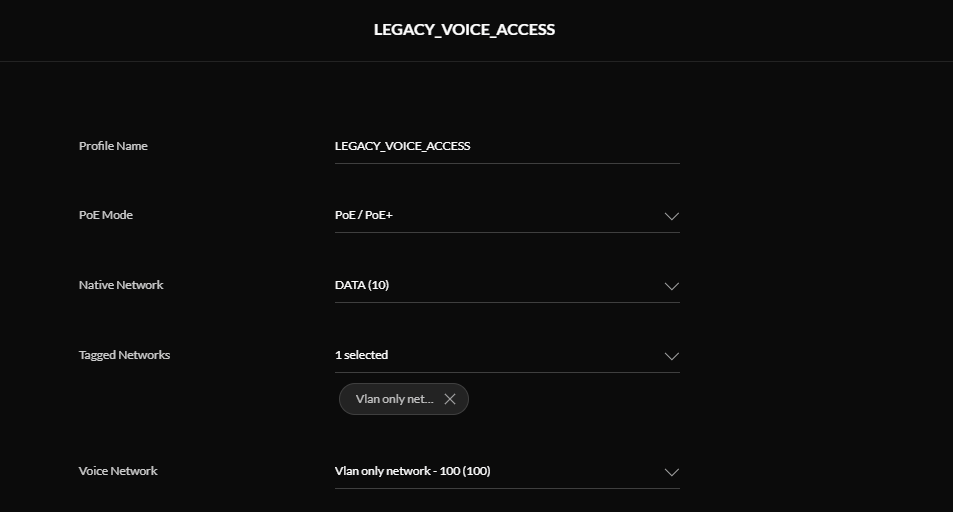
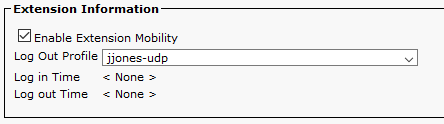
From my initial testing, I found that LLDP-MED does exactly what I need it to and the interoperability with my Cisco core/server switches is seamless.

I also found that my Cisco IP phones had plenty of power and registered without issue on the correct VLANs.

I have been incredibly impressed by this switch, and the rest of my Ubiquiti gear. I am sure there are those that will argue that comparing Ubiquiti and Cisco is far from an apples to apples comparison. I believe that argument has merit, but I prefer to respond in this way; I was able to deploy Layer 2 switching with PoE for $125. I don’t really think anything else needs to be said.

Justin

Advertisement

For Those Just Getting Their Start

Hello World!

I recently responded to a social media post asking for advice for those just starting out in System Administration, Engineering, or general Information Technology (I hate that term).

My response was this… “Keep climbing and don’t settle. Get your foot in the door where you can but realize that the sky is the limit if you have the acumen and drive”.

While I am happy with my response, it got me thinking; what else of value can I offer someone starting the journey that I have spent 22 plus years on? I came up with several things that I’ll list below but I would love to have your feedback as well.

  • Never stop learning. Technology is always changing and thus your knowledge must always continue to grow.
  • Be very careful with the mindset of “that job is beneath me”. I am guilty of this more times than I care to admit, but understand that even the most simple jobs can teach you things that you did not know before you performed them.
  • If your dream is to be a consultant, start as a customer first. Learn what you like and dislike from the consultants you work with. Learn the customer mindset and you’ll keep empathy for that mindset once you move to the other side of the table.
  • This matches up with the “beneath me” mindset point, but ALWAYS BE USEFUL. Volunteer for work that you want to do and for work that you don’t want to do. If your employer and/or your customers know they can count on you no matter the task, your relationship with them will vastly improve.
  • It is OK to say no, but have conviction in your answer. Technologists are generally very bad at self-preservation. We need to avoid burning out and sometimes that involves saying no. Use your “no’s” sparingly and understand when and where to not use them.
  • It is OK to make a mistake as long as you learn from that mistake. A mistake made once is a learning experience.
  • Do not be afraid to say “I don’t know, but I can find out”. Humility goes further than bullshit.

That is the short list that I came up with, what would you add? What do you not agree with? I understand that all of these will not be true for everyone, but I hope it provides some inspiration for those new to our field(s) and also those who, like me, have been on this journey for a while.

Justin

Quick & Dirty: Cisco Modern Router (ISR, ASR) Software Upgrades

Hello World!

Just a quick post today, and my usual apology for not posting more frequently.

If, like me, you find yourself doing ISR IOS XE upgrades, you realize that although it can be a quick process there is always room for improvement.

Today, while upgrading 15+ ISR 4451 CUBE routers, I decided to quickly “notepad script” my upgrade commands. For reference I am using an SFTP server for this upgrade but the plan works for FTP or TFTP if you wish.

My quick and dirty notepad script looks like this…

copy sftp: bootflash:
IP ADDRESS OF SFTP SERVER
USERNAME for SFTP SERVER
REMOTE SOFTWARE-PATH
LOCAL SOFTWARE-PATH
PASSWORD for SFTP SERVER
! (for Enter)

A quick copy and paste and the process has started. Once the copy is successful, a second quick and dirty script will change the boot path and then reboot your router.

config t
boot system bootflash:IOSXEFileName
exit
wr mem
reload
y

There is nothing special here, and there are far more elegant solutions but this works for me and hopefully it can work for you!

Justin

Ubiquiti USG: Quick & Easy Remote Access VPN

Hello World!

When I decided to purchase and install a Ubiquiti USG-3P security appliance, which you can read about here, one of the determining factors was that I could configure VPN service for remote connectivity. As I use Dynamic DNS (DynDns) with the USG (read about that here), I have a reliable VPN url that is always available.

Whenever you put “Quick & Easy” in the title of anything, the expectation is that the process is not difficult and does not take all day. Ubiquiti has made the process very simple, I’ll outline the steps below.

Step 1.  Configure the local Radius server

This first step is located under the Settings -> Services -> RADIUS -> Server   within the Unifi Controller software. Turn it on and set your Secret and you are good to go!

Step 2. Configure your Radius (VPN) User

This second step is located under the Settings -> Services -> RADIUS -> Users   within the Unifi Controller software. Turn it on and set your Password and you are good to go! Notice I left the VLAN blank. If I was using the USG as a switched Layer 3 device this would need to be filled in. As it stands my USG is basically running as a transparent firewall.

Step 3. Build your VPN Network (VPN Profile)

This third and final step (on the UBNT side) is located within the Settings section under Networks. You will create a new network and select Remote User VPN as the purpose. In my case I selected an L2TP  Server, you could select PPTP as well, but L2TP works for my purposes. You’ll then configure your Pre-Shared Key (PSK) and define your VPN subnet. I recommend making this network small and keeping it on a network convention dissimilar from your internal networks. Configure your Name (DNS) server(s) and other options and then select your Radius profile. In my case the simple Default profile was all I needed. Within the Radius profile configuration you could add an external Radius server if you have one in place currently. If that is the case the first two steps are not necessary.  The MS-CHAP v2 requirement is checked by default and you should use it for security.

At this point, we are done with our Ubiquiti configuration! That means it is time to move on to the client side. In my case that means Windows 10. There are L2TP/PPTP configuration guides out there for Mac and Linux as well but since I am using Windows, that is what I’ll cover.

Step 1. Go to the VPN Configuration Screen

In the image below you’ll see the VPN configuration screen that is under Settings -> Network & Internet -> VPN from here you can Add a VPN Connection. Once your connection is added you’ll see it in the list (as shown below) and also in the network status icon on your Windows taskbar (Windows 10).

Step 2. Configure the VPN Profile

Configuring the VPN profile for Windows 10 is very straightforward. You’ll need the public address of your USG (or your Dynamic DNS url) and you’ll need the Pre-Shared Key (PSK). You’ll also need (optionally) your username and password. If you don’t enter your username and password (shown in the image below) you’ll be prompted every time you connect.

Step 3. Connect

To connect to your VPN in Windows 10, select the network status icon in the task bar (usually a computer screen for wired or a wireless signal graph for wireless) and click on the VPN connection at the top of the box.

If you entered your username and password into the configuration page you should not be prompted for them, if you did not, you will need to enter them when prompted. Once connected, you’ll see the status above.

When I show my connection status I can see the VPN settings that I configured earlier (shown below).

In closing, this really is a quick and easy process. If you need easy and reliable remote access it is definitely something to consider. Also worth considering is that we are doing this configuration with PSKs and not with certificates. There are security considerations to take into account here.  With all of that said, I would 100% choose this option over users accessing systems remotely via the questionable applications that exist in the software client remote access space today.

I hope this helps someone! Questions? Comments? Post them below.

-Justin

Ubiquit USG: Native Dynamic DNS (DynDNS) Integration

Hello World!

This morning’s post will be quick, but hopefully useful. I recently wrote about my experience with acquiring and implementing a Ubiquiti Unifi Security Gateway (USG) as my edge firewall. That post is here.

One of the really handy things that the USG supports native Dynamic DNS integration with several different providers, including mine (DynDNS (now owned by Oracle). I know this isn’t a new feature for network gear to support but it is still a handy one in my book and I’m happy to have it.

The Dynamic DNS integration is incredibly easy to configure from the Unifi Controller interface. Shown below, you can find the Dynamic DNS configuration in the controller settings under Services. I am running version 5.10.25 on this controller. Also shown below is a listing of the supported dynamic dns providers.

An example configuration for DynDNS is shown below. Click the image to enlarge. It is important to note that DynDNS does now require a nominal subscription for this service (roughly $55 a year).

Finally, the host update logs from DynDNS (shown below). My particulars are blue’d out but you get the picture. This definitely beats running an agent on one of my Windows boxes.

I know that this isn’t an exceptionally complicated or exotic feature, but with traditional ISPs not giving out static IPs like they used to it is an important one.

I hope this post has been useful. If you have any questions, please post them in the comments below. More to come on the USG in later posts!

-Justin

Forgive Me Cisco for I Have Sinned (And I Liked It!)

Hello World!

If you’ve read any of my other posts, you have no doubt figured out, that I am a Cisco guy. Cisco’s products have kept me gainfully employed for many years (and hopefully for many years to come). I enjoy their technology but I also know they aren’t the only game in town.  I am also painfully aware of what it costs to play their game.

The Problem

Recently, my home network/lab Cisco ASA 5506-x died. This was a long expected outcome from a hardware clock malfunction that Cisco discovered a few years ago, you can read more about it here: https://www.cisco.com/c/en/us/support/web/clock-signal.html. If you have SmartNet support on your products this is a problem, but a covered problem. If, like me, you bought your products on Amazon or Ebay, you are screwed.

The Research

When the 5506-x died, I considered buying a Cisco Next Generation Firewall (NGFW) as a replacement (the 1010 would probably work). I’m not made of money and the thought of paying $800 on the gray market (or even from CDW) had me less than excited. I also considered buying a Sonic Wall, Juniper, or Palo Alto appliance but I don’t have support contacts/contracts for those brands and I want to be able to patch them (this is not a problem with Cisco). I then considered building an Endian or PfSense firewall but by the time I got the right appliance I would be out as much money as the Cisco option discussed above. With my home internet speed being over 100Mbps, I was going to need a very powerful box.  In case you are wondering what it takes to build a custom firewall, please see this link for sizing guidelines: https://www.firewallhardware.it/en/firewall-hardware-sizing-guide/. I was quickly running out of viable and reasonably professional options. It was then that I looked at my wall and found one more.

I started using Ubiquiti’s Unifi wireless access points a couple of years ago for a family business. I was impressed by the hardware and actually really liked the controller software as well. Being able to extend SSIDs across multiple access points without giving up backhaul bandwidth (assuming you have LAN drops where you need them) is a professional feature and one that I take advantage of often. Consumer grade multi-unit systems dedicate channels (and thus a portion of total throughput) to the backhaul communication between the “access points” and the base station. I also like the Ubiquiti price. The 802.11ac access point above, was $99 on Amazon. When it came time to put access points in my home the Ubiquiti option was an easy choice to make.

“If their access points are great, maybe I should give their firewalls a try.”

The Decision

The Unifi Security Gateway (USG) is a powerful platform. The architecture follows the versatile Edge architecture that Ubiquiti was originally known for. While the Edge platform devices have individual web interfaces and operate autonomously, the USG registers to and is managed by the Unifi Controller. Luckily, the USG does still include SSH/Console access to the powerful Ubiquiti CLI. The CLI is a cross between Unix, BSD, and Cisco’s IOS but once you understand it, it is very useful.

There are currently three (3) models of the security gateway available…

  1. USG
    • 3 1G ports
    • $138 + shipping on Ubiquiti Store
  2. USG‑PRO‑4
    • 4 1G ports (2 with dual-personality SFP ports)
    • $344 + shipping on Ubiquiti Store
  3. USG-XG-8
    •  8 10G SFP+ ports
    • $2,499 + shipping on Ubiquiti Store

I chose the USG. Small but mighty! Price aside, this little box will handle more bandwidth than I can currently throw at it*. With that said, the price is nice too.

*This is without IPS (currently beta) enabled. If you enable IPS the hardware offload is turned off and all packets are processed via software. This limits the throughput of each device as follows…

  1. USG: 85Mbps
  2. USG-Pro-4: 250Mbps
  3. USG-XG-8: 1Gbps

With the above numbers, I will probably be replacing my USG with a USG-Pro-4 (or whatever the next generation option is) in a few months. I want to take advantage of the IPS functionality but don’t want to limit my Internet bandwidth. Currently, this is a minor concern.

The Configuration

Setting up the USG took more time than you might expect. Part of this was my architecture; Ubiquiti likes their routing devices (the USG in this case) to be the end-all/be-all Layer 3 device in the network. In my network, that is not the case. I traditionally run my firewalls in transparent mode and use a Layer 3 “core” switch to handle the inter-vlan routing and segregation of traffic. I want the firewall to terminate the WAN/Internet connection and secure the connection as well as handle the NAT/PAT responsibilities but I want it to end there. My logical configuration is laid out in the image below.


As you can see from the logical diagram above, my USG sits in the “normal” firewall position between the provider NIU and my LAN. I am handling all VLAN routing and inter-VLAN routing on the 3750x. On the switch I have a static default-route pointing at 10.10.0.230 (the LAN IP of the USG) (shown below).

ip route 0.0.0.0 0.0.0.0 10.10.0.230

In the USG I have routes going back to the my 3750x (10.10.0.254) for the networks configured there (shown below).

static {
        route 10.10.10.0/24 {
            next-hop 10.10.0.254 {
                distance 1
            }
        }
        route 10.10.30.0/24 {
            next-hop 10.10.0.254 {
                distance 1
            }
        }
        route 10.10.100.0/24 {
            next-hop 10.10.0.254 {
                distance 1
            }

Finally I have a NAT rule in the USG allowing everything that goes out of eth0 (WAN) to be source NAT’d accordingly (shown below). This works well as I have a DHCP connection from my ISP.

rule   type  intf     translation
----   ----  ----     -----------
6001   MASQ  eth0     saddr ANY to X.X.X.X
    proto-all         sport ANY

Conclusion

I admit it is still early (as I’ve only had the USG in place for about a week), but I am impressed by that little box. No loss in throughput and I enjoy having the Internet statistics on my Unifi mobile application. The USG wasn’t my first choice but the more I do with it the more I am convinced it was the right choice for my environment.

Below are a few quick additions that I didn’t get to cover in this post, I plan on adding posts for these features later…

  • NAT/PAT for Cisco Unified Border Element (CUBE)
  • Dynamic DNS (DynDNS) native integration
  • Quick and Easy VPN Client configuration

-Justin


CUCM: TLS 1.2 and Legacy Phones

Hello world!

Today’s post will be quick and dirty but hopefully useful.

In Cisco Call Manager (CUCM) version 11.5(1)SU3 support was introduced for Transport Layer Security (TLS) versions 1.1 and 1.2. Prior to this release 1.0 was the only supported version. With security being the driving factor in much of the IT world these days, there is a push to secure everything to the highest available level, that includes the Collaboration environment. I have many customers that want to take advantage of the higher TLS version levels and that is a good thing, but there are gotchas.

If you know anything about Cisco IP phone communications you know that several services; and specifically the Corporate and Personal directory service are pre-configured applets that run between the phone and CUCM. In the case of the directory service(s) they talk using 8443 which is a secure port and thus uses a certificate to communicate (along with the Trust Verification Service (TVS)). That certificate is directly encrypted with the help of TLS. Because support for the newer/higher TLS versions has only recently come into play there are several generations of IP phones that do not support anything above TLS 1.0 (or 1.1 in some cases). This list of legacy endpoints includes the 7900 series and Cisco’s previous “Cadillac” the 9900 series as well as others.

If you have legacy endpoints and change your TLS version to something above 1.0 you will notice that the directory services on those endpoints will fail with a “Host not found” error. What is actually happening involves a failed TLS handshake between the phone and the Trust Verification Service (TVS) on CUCM. Because the phone cannot communicate with the TVS using TLS 1.2 the handshake fails and the directory service cannot be accessed.

So what are your options?

  1. Replace your legacy phones, there is always a financial fix and this is it.
  2. You can manually create a directory service that talks HTTP and assign it to the phones. You could make this an Enterprise Subscription if you want everyone to use it. The URL that you should use is: http://YOURCUCMFQDNorIPHere:8080/ccmcip/xmldirectory.jsp. Since this is an HTTP service you can use the IP instead of the FQDN. This will allow the service to function whether name services are functional or not. This will require user training but may make the most sense depending on the environment.
  3. Revert to TLS 1.0. This sounds easy, but there are gotchas here too.

The gotchas of going back…

Switching from TLS 1.0 to TLS 1.1 or 1.2 (If you are going to change, go to 1.2) is a relatively straight forward process. You log into the platform CLI of your CUCM publisher and any subscribers and issue the following command set tls min-version 1.2. When you enter this command you will be asked to confirm and once confirmed (with yes) the system will restart. This happens immediately and should only be done during a maintenance window.

Switching back from TLS 1.2 to 1.0 follows the same steps with the same command and the same reboot process. However, when you switch back from a higher TLS version to a lower TLS version, anything that was encrypted using that higher TLS version becomes invalid. This includes certificates (which automatically regenerate) and also the application UI password store  (including your CCM Administration credential). This password must be reset from the CLI and changed to something different before you can log into the system again. Note that this does not change your Prime License Manager (PLM) admin password if co-resident with your CUCM.

Security is important and continually making our security better is the only way to prevent incidents. With that said, proper planning will stop security changes from turning into outages.

Cisco’s TLS 1.2 Compatibility Matrix: https://www.cisco.com/c/en/us/td/docs/voice_ip_comm/uc_system/unified/communications/system/Compatibility/TLS/TLS1-2-Compatibility-Matrix.html

CUCM: The Logout Profile

Good Morning Readers!

Today’s post is quick and dirty. If you work in an environment where Extension Mobility is widely used, the content of this post is probably common knowledge and you can stop reading here if you like.

For those curious about Extension Mobility, there are a ton of resources on the Internet that can show you how to use and configure it as well as how it impacts your CUCM licensing. If you don’t know what CUCM stands for, this probably isn’t the post for you.

I was recently dealing some odd behavior from one of the 7841 IP Phones in my lab. Despite the fact that I had logged out my Extension Mobility (EM) user, their details (their User Device Profile) were still showing up on the physical phone. I reset the phone, checked the cluster for DB errors, and scratched my head a lot. I then proceeded to smack my head when I remembered the logout profile configuration in CUCM.

If you know anything about Unified Communications Manager Express (UCME), you know that the logout profile is very common on this platform. EM cannot exist on UCME without it. In CUCM we get spoiled, we can use existing device configuration details and do not have to specify a logout profile, there is however still a place for one.

In a perfect world a logged out EM configuration (in CUCM) should look like this:

This denotes that when a user logs out of the phone, the phone will use whatever configuration data exists in CUCM.

If however, a logout profile gets set (as shown below), the phone will display that profile upon an EM logout.

This is exceptionally confusing when the profile that was just logged out happens to also be the logout profile!

Obviously this was a misconfiguration on my part. Instead of just checking the box to enable Extension Mobility, I also specified a user profile. This lead to several minutes (a good half hour) of me troubleshooting a problem that inevitably had no problem at all.

Thanks for reading and hopefully you got some enjoyment laughing at my screw-up.

-J


My Linux Logging Adventure: RSyslog

Hello World!

If you are still reading after the title of this post, I commend you. Writing about logging, and more specifically, a syslog server is difficult to get excited about and I can only assume that it is equally hard to get excited about reading.

I should preface this by saying I am not a “Nix” guy. I’ve dabbled in nearly every flavor of Linux over the last 20 years or so but I’m definitely not a Linux over Windows guy (with the notable exception of purpose-built hardened linux appliances) nor will I ever claim to be. With that said, I like the simplicity of Linux specifically in the utility space. A Linux TFTP/FTP/SFTP server makes far more sense than a Windows box doing the same job, as does a Linux jump box (depending on what you are jumping to). To that end, when I decided to add a syslog server to my lab/development environment; Linux was far and away the best choice.

I am choosing to use Ubuntu as my flavor of choice for this particular Linux project as I generally like the look and feel of it. I am using the server distro and while I am now running 18.0.4 LTS, I did not start out that way. I tried 18.0.4 as a fresh install in my virtual (VMWare ESXi) environment but found that I could not get past configuring the network interface in the setup UI. I would verify the interface (it was correct) and then setup my IP address (static in this case, although I did also try DHCP). This seems simple enough, but once I attempted to save my network settings the UI would reset and I would once again be back at the start of the setup process. I experienced this several times before I gave up and went another way. The “Other Way” in this case was to first install release 16.0.4 and then allow the system to upgrade to 18.0.4. This worked without problem.  I just so happened to have 16.0.4 in my software repository but I’m sure I could have upgraded from other releases as well. In doing some research, it seems that Ubuntu introduced a different network configuration manager in 18.0.4 and I’m guessing that it was not playing nice with ESXi.

Now that I have my Linux platform, the installation of the RSyslog server packages is unimpressive. The command to fetch and install the package on Ubuntu is listed below.

apt-get install rsyslog

Once the install is complete the configuration can begin. If all you want is an external place to drop your syslog data this will take no time at all.

In /etc you’ll need to edit the rsyslog.conf file. For the most basic functionality you need to make sure that RSyslog is listening. In my environment UDP for syslog is fine and I also use the standard port (514).

When you initially open the configuration file you’ll notice that UDP (and TCP as well) are commented out. This means that RSyslog is only processing local syslog events (See snippet below).

# provides UDP syslog reception
# module(load="imudp")
# input(type="imudp" port="514")

# provides TCP syslog reception
#module(load="imtcp")
#input(type="imtcp" port="514")

Since I am using UDP, I want to un-comment the module and input lines associated to that protocol (see snippet below).

# provides UDP syslog reception
module(load="imudp")
input(type="imudp" port="514")

Once I have done this, I can restart the RSyslog service and my server is now ready to receive. The restart command is below for your reference.

sudo systemctl restart rsyslog

Upon a successful restart (assuming there is a device setup to send syslogs), I should see new messages in my syslog file located at /var/log/syslog (snippet shown below).

Mar 18 06:25:02 linutil01 rsyslogd: [origin software="rsyslogd" swVersion="8.32.0" x-pid="1051" x-info="http://www.rsyslog.com"] rsyslogd was HUPed
Mar 18 15:30:01 vmhost02.sprnet.local Rhttpproxy: message repeated 2 times: [ verbose rhttpproxy[FFFC3B70] [Originator@6876 sub=Proxy Req 01543] Resolved endpoint : [N7Vmacore4Http16LocalServiceSpecE:0x1f08e318] _serverNamespace = /sdk _isRedirect = true _port = 8307]
Mar 18 15:30:01 vmhost02.sprnet.local Rhttpproxy: message repeated 2 times: [ verbose rhttpproxy[56E54B70] [Originator@6876 sub=Proxy Req 01543] Resolved endpoint : [N7Vmacore4Http16LocalServiceSpecE:0x1f08e318] _serverNamespace = /sdk _isRedirect = true _port = 8307]

In the above snippet, there are three entries. The first entry is from my local Linux box (linutil01) and the next two are from one of my VMWare ESXi hosts (vmhost02.sprnet.local).

If you have a small environment and only a handful of devices sending to your syslog server, the above configuration may be all you need. If, like me, you want something that is more organized, I think I can help.

While there are several ways of accomplishing organization in RSyslog, I am choosing to organize my logs by hostname and service name. For the purposes of this example, I have two ESXi  hosts that are logging to the server.

To start, I need to go back to the rsyslog.conf file that I wrote about earlier. I need to tell the server what logs I want to be stored and where/how I want to store them.  I can do this with a template. I’ve posted the template configuration snippet below.

# Templates
$template RemoteHost,"/var/log/%HOSTNAME%/%PROGRAMNAME%.log"
#Remote Logging
$Ruleset remote
*.* ?RemoteHost
#Bind Ruleset to UDP Listener
$InputUDPServerBindRuleset remote
$UDPServerRun 514

In the snippet above, I have my template name RemoteHost and I have where I want to store/categorize my logs /var/log/%HOSTNAME%/%PROGRAMNAME%.log. The %HOSTNAME% and %PROGRAMNAME% sections are variables and are filled in by the servers internal syslog facilities. Note that I have logs being stored in the /var/log/ directory. If you want to store your logs here you will have to change ownership properties of the directory (snippet below) so that syslog can create and write there. I also have a Ruleset that I am binding my template to. In my configuration that ruleset is called remote. I bind my template to the remote ruleset which includes every message coming into the server on UDP port 514.

cd /var && sudo chown syslog:syslog log

Once I complete the configuration above and restart my RSyslog service, I should start seeing directory entries like the ones shown below in my /var/log/ directory.

drwxr-xr-x 2 syslog syslog 4096 Mar 16 13:56 vmhost01.sprnet.local
drwxr-xr-x 2 syslog syslog 4096 Mar 16 13:55 vmhost02.sprnet.local

If I go into one of these directories, I should see several different .log file entries (snippet shown below).

-rw-r----- 1 syslog adm 0 Mar 16 13:55 bootstop.log
-rw-r----- 1 syslog adm 10263 Mar 16 11:15 cimslp.log
-rw-r----- 1 syslog adm 97516 Mar 18 07:01 crond.log
-rw-r----- 1 syslog adm 10474 Mar 18 07:01 heartbeat.log
-rw-r----- 1 syslog adm 777730 Mar 18 07:00 hostd-probe.log
-rw-r----- 1 syslog adm 5345 Mar 18 06:01 ImageConfigManager.log
-rw-r----- 1 syslog adm 0 Mar 16 13:55 init.log
-rw-r----- 1 syslog adm 3033018 Mar 18 07:01 Rhttpproxy.log
-rw-r----- 1 syslog adm 0 Mar 16 13:56 root.log
-rw-r----- 1 syslog adm 0 Mar 16 13:55 sfcbd.log
-rw-r----- 1 syslog adm 0 Mar 16 13:56 sfcbd-watchdog.log
-rw-r----- 1 syslog adm 0 Mar 16 13:56 sfcb-ProviderManager.log
-rw-r----- 1 syslog adm 6384 Mar 18 06:36 sfcb-vmware_raw.log
-rw-r----- 1 syslog adm 16384 Mar 16 13:56 slpd.log
-rw-r----- 1 syslog adm 171223 Mar 18 06:35 smartd.log
-rw-r----- 1 syslog adm 47693 Mar 18 07:00 syslog.log
-rw-r----- 1 syslog adm 128 Mar 15 16:05 tmpwatch.log
-rw-r----- 1 syslog adm 4096 Mar 16 13:55 vmauthd.log
-rw-r----- 1 syslog adm 6189399 Mar 18 07:01 vmkernel.log
-rw-r----- 1 syslog adm 827731 Mar 18 07:00 vmkwarning.log
-rw-r----- 1 syslog adm 0 Mar 16 13:55 VMware.log
-rw-r----- 1 syslog adm 3633994 Mar 18 07:01 vobd.log
-rw-r----- 1 syslog adm 69577951 Mar 18 07:01 Vpxa.log
-rw-r----- 1 syslog adm 0 Mar 16 13:56 watchdog-cdp.log
-rw-r----- 1 syslog adm 0 Mar 16 13:56 watchdog-dcbd.log
-rw-r----- 1 syslog adm 0 Mar 16 13:56 watchdog-net-lacp.log
-rw-r----- 1 syslog adm 0 Mar 16 13:56 watchdog-net-lbt.log
-rw-r----- 1 syslog adm 0 Mar 16 13:56 watchdog-nscd.log
-rw-r----- 1 syslog adm 0 Mar 16 13:55 watchdog-openwsmand.log
-rw-r----- 1 syslog adm 0 Mar 16 13:56 watchdog-sdrsInjector.log
-rw-r----- 1 syslog adm 0 Mar 16 13:56 watchdog-smartd.log
-rw-r----- 1 syslog adm 0 Mar 16 13:56 watchdog-vobd.log
-rw-r----- 1 syslog adm 0 Mar 16 13:56 watchdog-vpxa.log

I now have an organized version of the chaos that syslog directories often hold. I can look at the systems and services that I need to without sorting through all of the other notifications that often get in the way.

I hope this has been helpful to someone, there are a lot of great resources online and mine is simply a collection of what worked for me. Thank you for reading, please ask any questions in the comments section and I’ll do my best to respond in a timely manner.

-Justin


CCIE Collaboration Lab: My Return Trip

If you follow this blog regularly (it says a lot about you, but that is for a different post) you know that last year, 2016, I took my first crack at the CCIE Collaboration practical lab exam. I took it in RTP (North Carolina) and it royally kicked my ass.

It is now nearly 12 months later and I am preparing for my second attempt. This year I have built my own lab instead of renting rack space from INE (who I believe I still owe money to from last year, but so far they haven’t come to collect). I am taking the exam on April 25 in RTP once again and while I am going to give it my very best shot, I am taking it because I honestly have no desire to attempt the written again and if I wait more than 12 months to attempt the lab my current written will be invalidated.

I’ll probably have more posts as the weeks draw closer, but the most important thing to note so far is that it is getting cheaper to purchase your own lab hardware. With Cisco coming out with the 44xx and 43xx ISR G3 routers the 29xx ISR G2 routers, which are still the hardware of choice for the current lab iteration, have become cheaper in the secondary market. I’m not saying that building a lab is cheap, by any means, but at least more folks now have that option. In my case,  my lab contains the following…

  1. 3825 – PSTN/BB Router. This is running CME for PSTN emulation. I am running PRIs to all 3 of the site routers; T1 PRIs the US sites and an E1 to the international site, I am using fractional PRIs to save on DSP resources.
  2. Dell Server 72GB Ram, Dual Xeon, SSD USB Drives (new addition) – This started life as a very weird CS-24TY but has now been revamped and runs all of my lab VMs easily.
  3. 2921 for HQ (2) PVDM-3 16 DSPs (this is actually enough for homogeneous video conferencing).
  4. 2821 for Site-B PVDM-2 64 DSP (good for voice only) (Generally Site-B is H.323 and possibly CUBE, a 2821 will run 15.1.x code which is not perfect but is close enough for that location). If I am asked switch/conference video at Site-B, I am S.O.L.
  5. 2811 for Site-C (CME)… I actually just ordered a 2911 and ISM-SRE-300 module to replace the 2811 as there are some serious differences between 15.1.x CME and 15.2.x and later CME i.e. CME 9/10.5/etc. I have a CUE module in the 2811 but I made the decision to spend money and get something closer to actual.
  6. 9971 phones as required (cheap enough used) and 7962 phones instead of 7965s as the differences between the two SCCP options are not that great and it saves some money.

In the back-end of the lab I also have a 3750 switch that I am using as a layer 3 WAN cloud instead of Frame Relay (which only matters in the QoS sections) and a 2960G PoE switch which I am using for phone power. I know the syntax is different but I cannot yet justify spending money or effort to aquire PoE  EHWICs.

I also have another Dell Server which hosts my “production” 11.5 CRS infrastructure which I can use for BB SIP calls as needed.

My setup is not perfect but perfect honestly costs to much. The fact that I can come down to my basement and practice whenever I want without having to reserve pricey rack space makes my setup perfect for me.

How about you? Do you have a lab? What are you running? Any suggestions? Comments? Questions? Leave them below!

-Justin