Hello World!
When I decided to purchase and install a Ubiquiti USG-3P security appliance, which you can read about here, one of the determining factors was that I could configure VPN service for remote connectivity. As I use Dynamic DNS (DynDns) with the USG (read about that here), I have a reliable VPN url that is always available.
Whenever you put “Quick & Easy” in the title of anything, the expectation is that the process is not difficult and does not take all day. Ubiquiti has made the process very simple, I’ll outline the steps below.
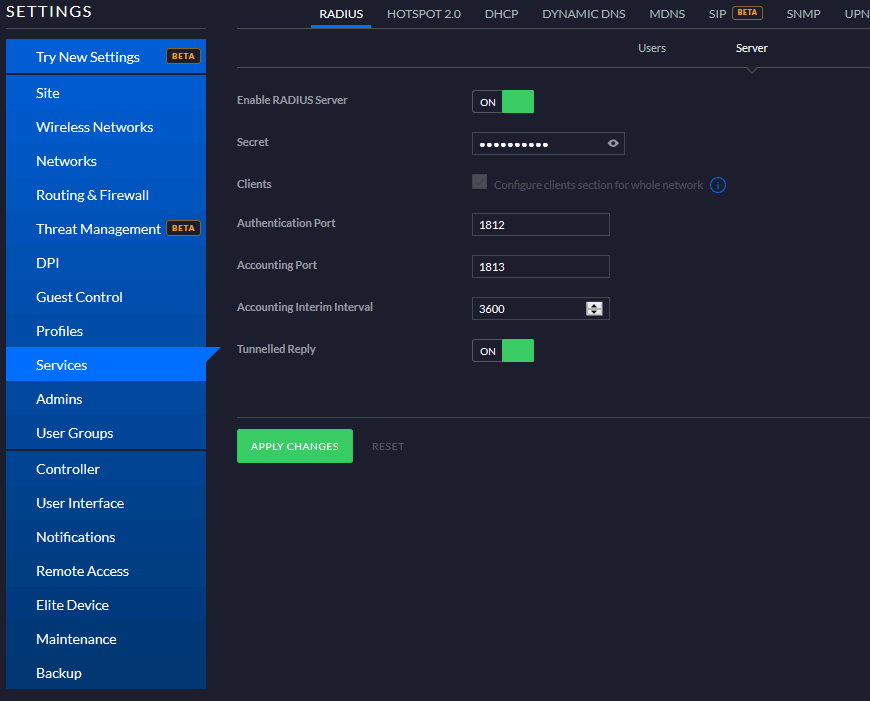
Step 1. Configure the local Radius server
This first step is located under the Settings -> Services -> RADIUS -> Server within the Unifi Controller software. Turn it on and set your Secret and you are good to go!
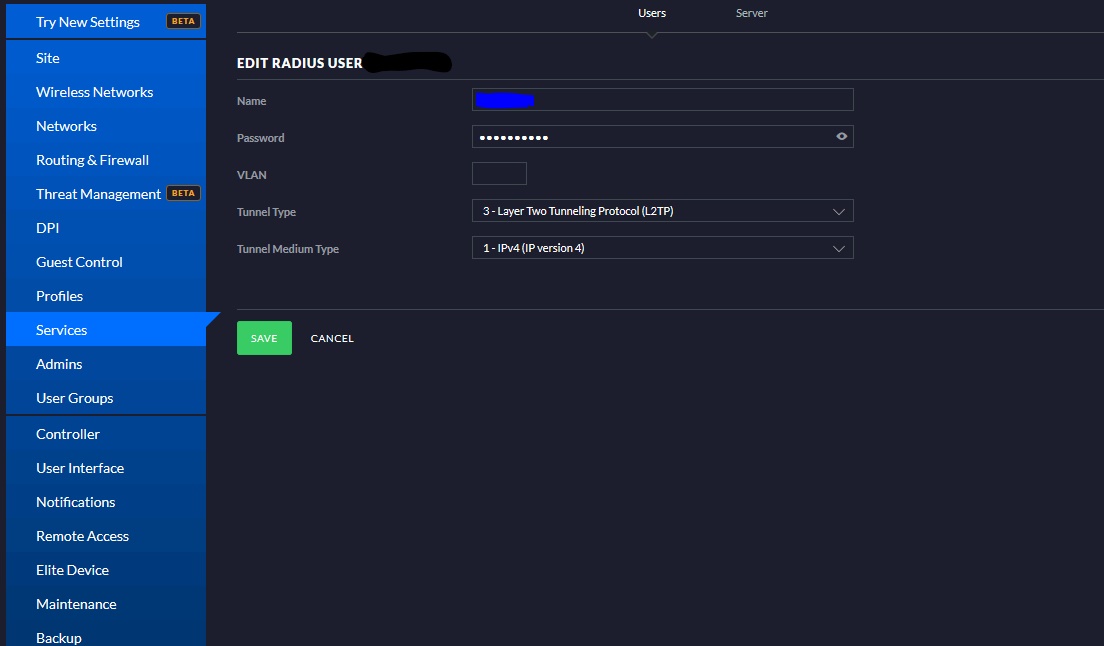
Step 2. Configure your Radius (VPN) User
This second step is located under the Settings -> Services -> RADIUS -> Users within the Unifi Controller software. Turn it on and set your Password and you are good to go! Notice I left the VLAN blank. If I was using the USG as a switched Layer 3 device this would need to be filled in. As it stands my USG is basically running as a transparent firewall.
Step 3. Build your VPN Network (VPN Profile)
This third and final step (on the UBNT side) is located within the Settings section under Networks. You will create a new network and select Remote User VPN as the purpose. In my case I selected an L2TP Server, you could select PPTP as well, but L2TP works for my purposes. You’ll then configure your Pre-Shared Key (PSK) and define your VPN subnet. I recommend making this network small and keeping it on a network convention dissimilar from your internal networks. Configure your Name (DNS) server(s) and other options and then select your Radius profile. In my case the simple Default profile was all I needed. Within the Radius profile configuration you could add an external Radius server if you have one in place currently. If that is the case the first two steps are not necessary. The MS-CHAP v2 requirement is checked by default and you should use it for security.

At this point, we are done with our Ubiquiti configuration! That means it is time to move on to the client side. In my case that means Windows 10. There are L2TP/PPTP configuration guides out there for Mac and Linux as well but since I am using Windows, that is what I’ll cover.
Step 1. Go to the VPN Configuration Screen
In the image below you’ll see the VPN configuration screen that is under Settings -> Network & Internet -> VPN from here you can Add a VPN Connection. Once your connection is added you’ll see it in the list (as shown below) and also in the network status icon on your Windows taskbar (Windows 10).


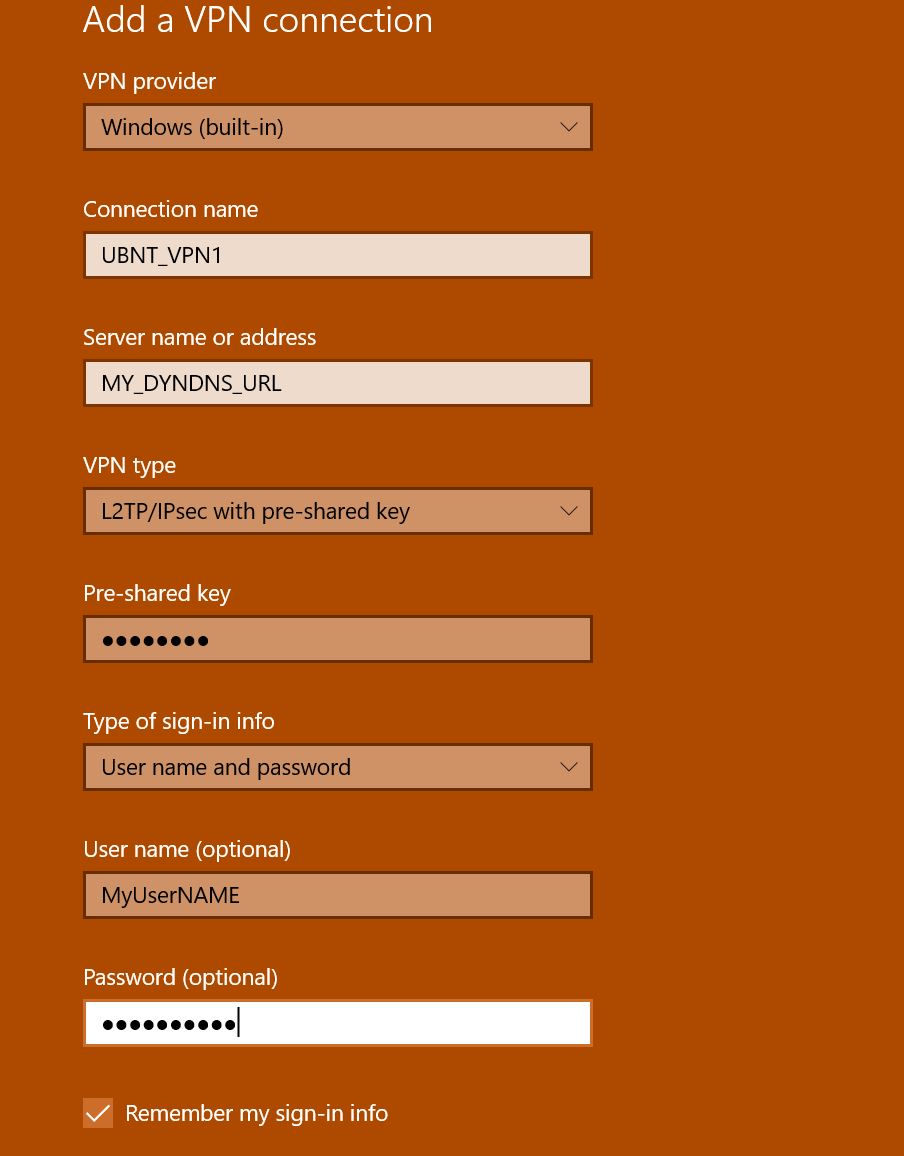
Step 2. Configure the VPN Profile
Configuring the VPN profile for Windows 10 is very straightforward. You’ll need the public address of your USG (or your Dynamic DNS url) and you’ll need the Pre-Shared Key (PSK). You’ll also need (optionally) your username and password. If you don’t enter your username and password (shown in the image below) you’ll be prompted every time you connect.
Step 3. Connect
To connect to your VPN in Windows 10, select the network status icon in the task bar (usually a computer screen for wired or a wireless signal graph for wireless) and click on the VPN connection at the top of the box.

If you entered your username and password into the configuration page you should not be prompted for them, if you did not, you will need to enter them when prompted. Once connected, you’ll see the status above.
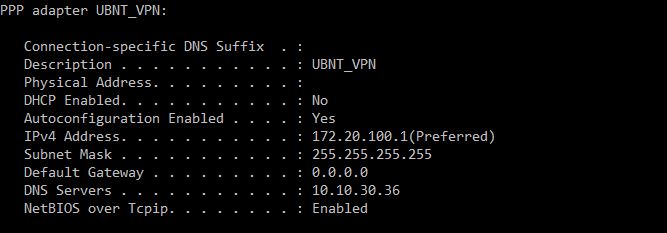
When I show my connection status I can see the VPN settings that I configured earlier (shown below).
In closing, this really is a quick and easy process. If you need easy and reliable remote access it is definitely something to consider. Also worth considering is that we are doing this configuration with PSKs and not with certificates. There are security considerations to take into account here. With all of that said, I would 100% choose this option over users accessing systems remotely via the questionable applications that exist in the software client remote access space today.
I hope this helps someone! Questions? Comments? Post them below.
-Justin
